Building a block
Development of a Historiana Building Block
= A programmer's guide =

This documentation was created to support the partners in Opening Up Historiana
Please note that Historiana is a project in continious development
Use the source as your definitive guide, and please cooperate and contact us before you start any significant work
Introduction
With the Historiana site an important part is the eActivity builder where teachers can build their own activities, and share them with students to use or others to copy.
The eActivity Builder (Builder) uses “blocks” as its singular unit to create any activity. Blocks can be set in sequence and can be rearranged as needed. Each block contains a single unit of activity, the sequence of activities is called the eActivity.
The information and activity within a block should be as simple as possible and any user experience within the block should be uniform in the interface and not contain complex layers of navigation. The block has a canvas, additional tools relevant to the block are appearing aside the canvas, for example:
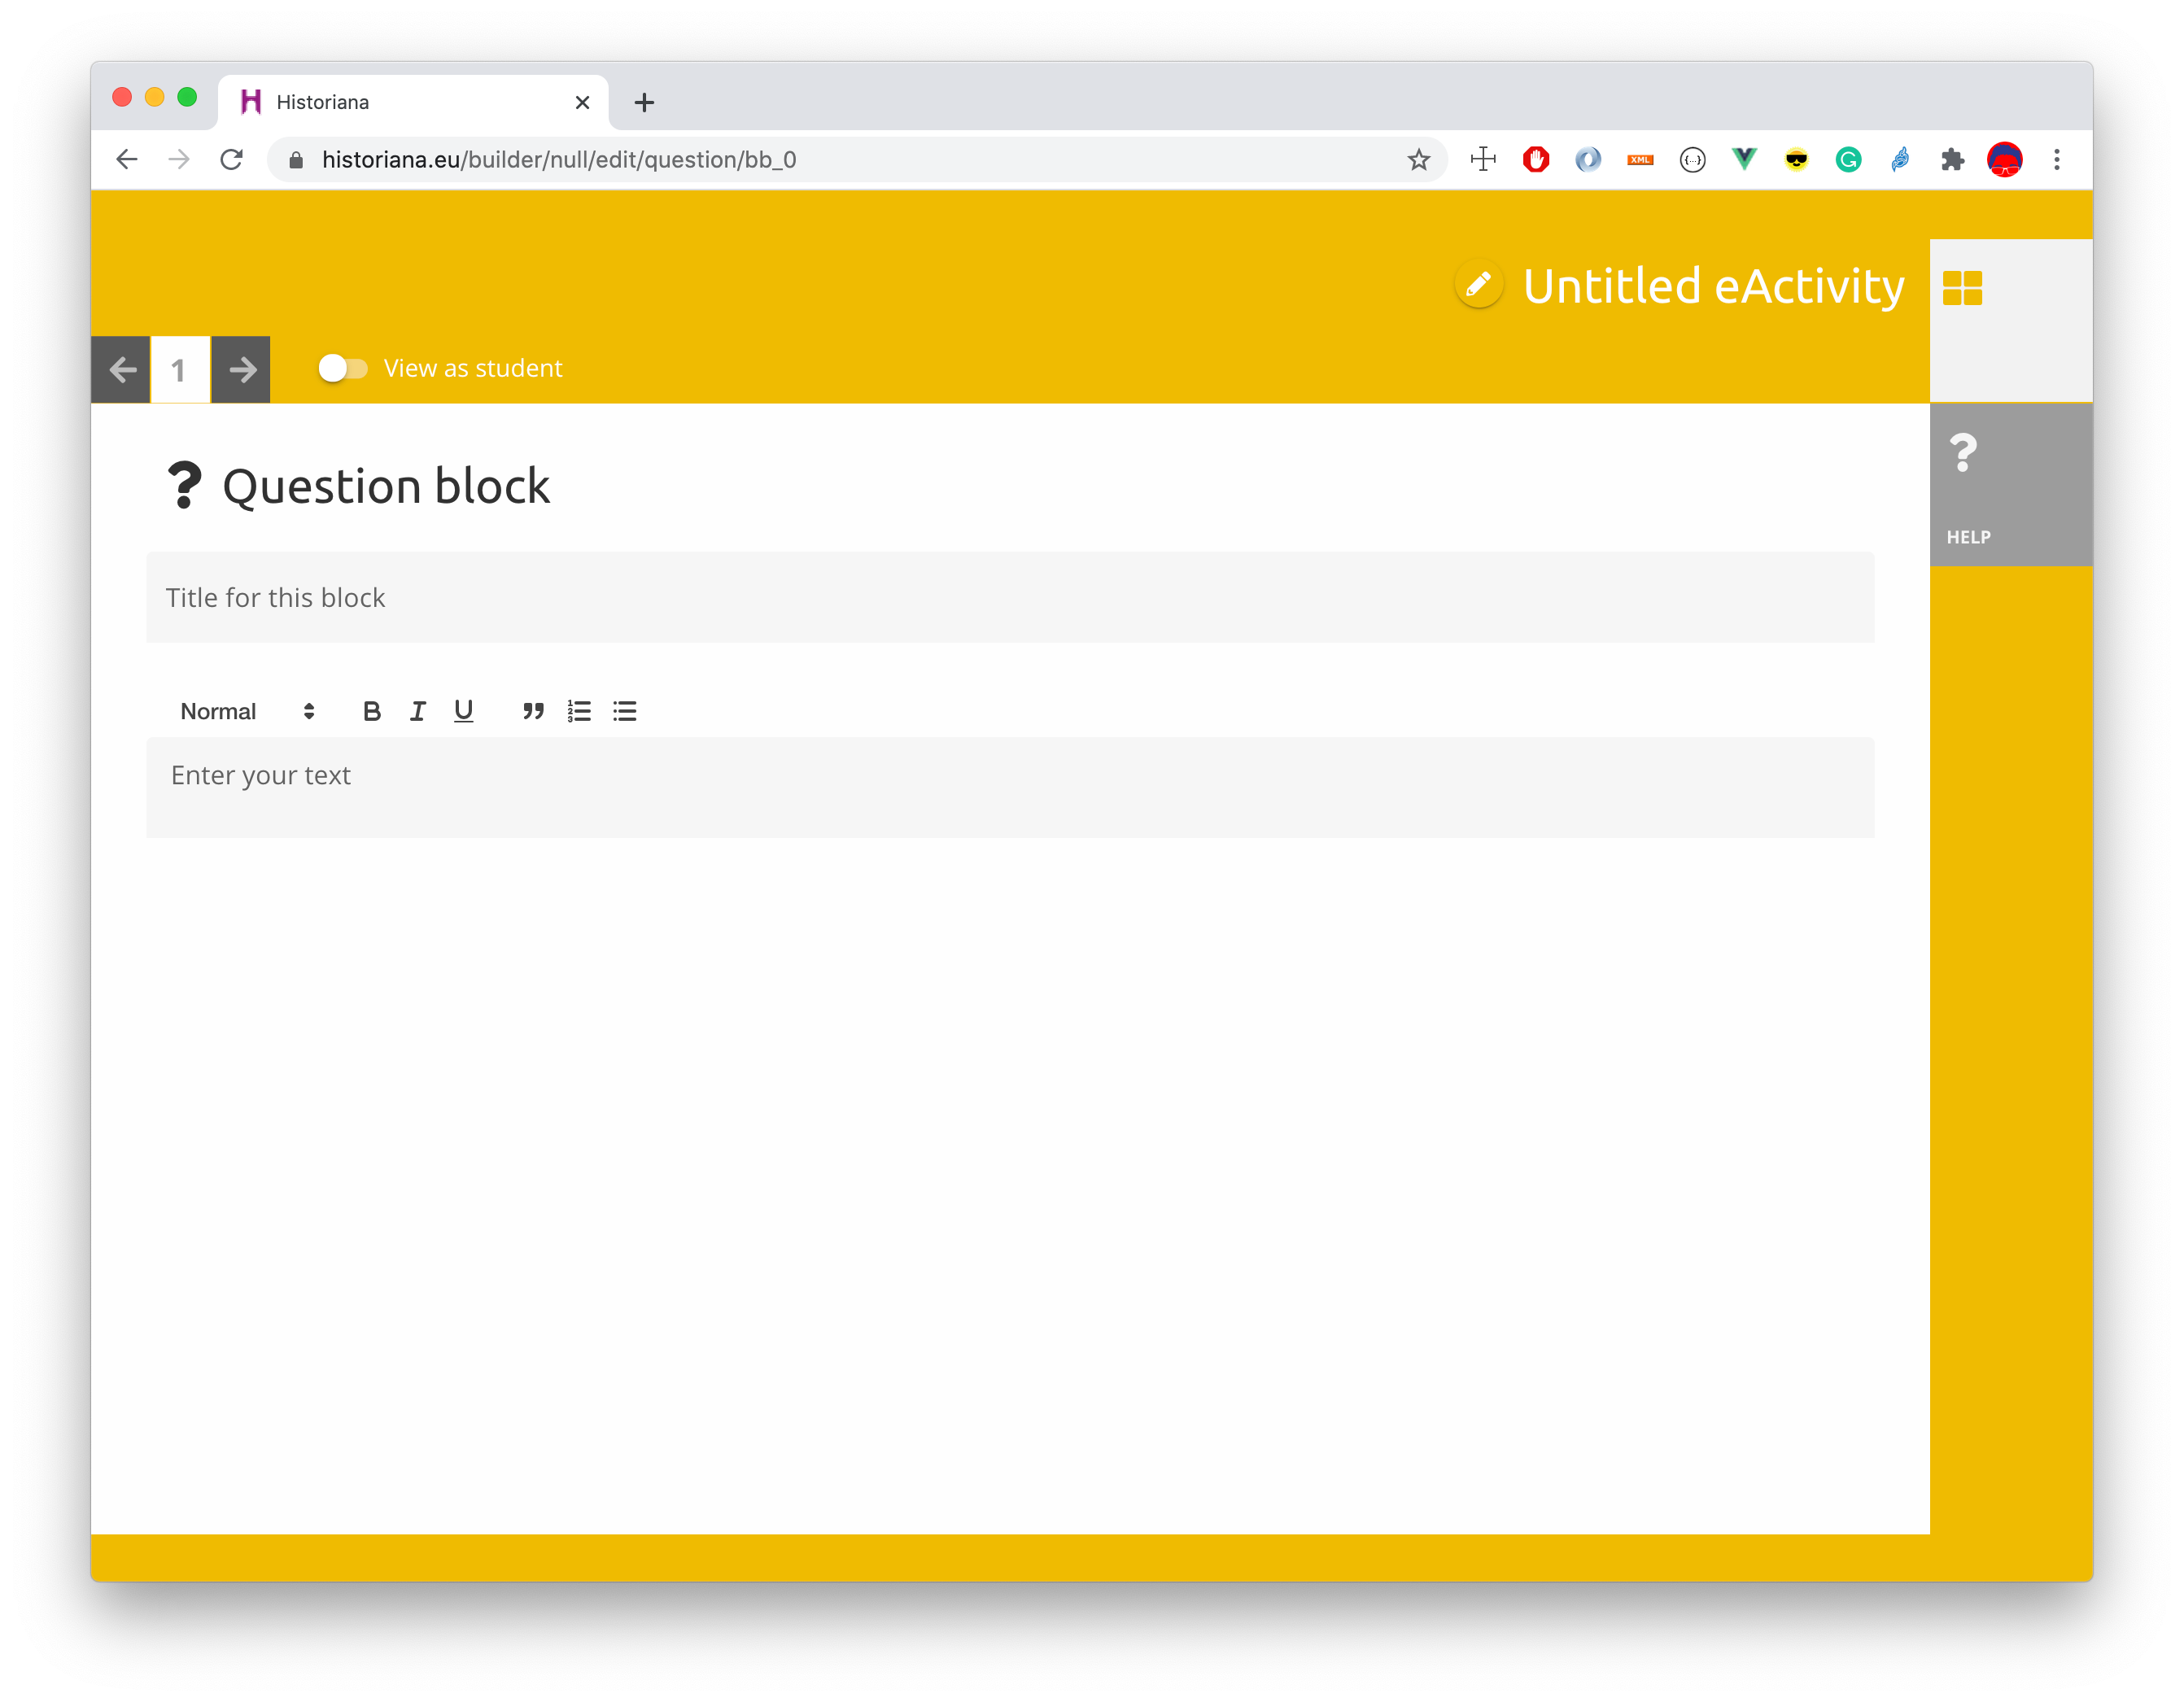
The environment in which a block can be made is called the BlockEditor, the visual representation is:
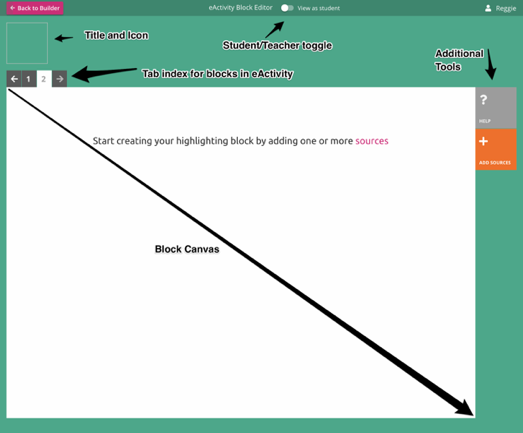
The interface of the block itself is in the white canvas, all other functionality is provided by the BlockEditor. In order to operate correctly the code for the block has to follow certain rules.
An author of a new block is not supposed to alter code outside their own block. Within the design of the builder it is assumed that altering code in BlockEditor.vue or accompanying modules is not needed at all.
A new block can either be a single file if it a very simple block, or it can be a Folder within the eabuilder directory structure as shown below:
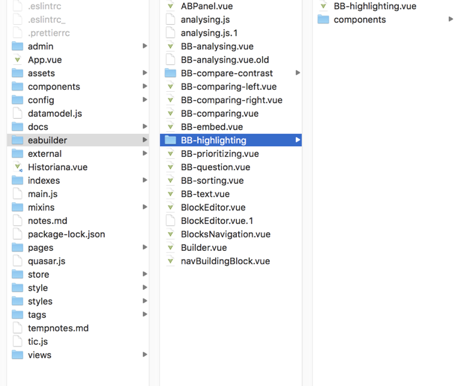
To activate a new Block the following files need to be added:
src/eabuilder/ABPanel.vue add the block to the Builder interface src/styles/eActivity.styl add styling for the block src/config/routes.js add routing for the block to the project
These three files are the three only files needed to be altered, all other code needs to be within the block.
If other modifications are needed please illustrate your use-case and contact the Historiana developers via Gitlab.
Development of a new block is done in a separate branch of the codebase in Gitlab. It is very well possible that there is active development in the branch at the same time you are working on your project. Please monitor the main development branch and update from it often to avoid integration problems in a later stage. Also see the “Tracking Development” paragraph later in this document.
The structure of a block
Familiarity with the Vue ecoystem is assumed; if you need to refresh your knowledge this might be a good read: https://medium.com/@_shirish/thinking-in-components-with-vue-js-a35b5af12df and the main Vue site at https://vuejs.org/ has extensive documentation as well.
The Historiana project is one big Vue Application, the router determines which part of the code is currently in scope. An active block is either displayed in the builder (BlockEditor) or in the viewer (ea/viewer).
When your block is in scope these three parameters are active:
blockId: the id of the current block mode: either contains ‘student’ or ‘teacher’ to reflect the state. editor: true when in BlockEditor, used to disable answering in student preview showHelp: true when help is requested from the sidebar navigation
You can have your own local data in the Vue data(){} block
The data which is needed to create the actual block typically is stored as record while answers by a student as stored in answers.
See for example the BB-question block which also shows that you can call
this.$store.commit('activity/setRecord', {
  block: this.blockId,
  record: this.localRecord
});
To store the data of the block and
this.$emit('answer', {
  text: this.studentAnswer
});
To retrieve the record and answer from the store you can use:
 computed: {
   ...mapGetters('activity',['record','answer']),
}
As the data might change after the block is mounted, it is advised to implement a watcher for the record and initialize your block from there:
 watch: {
   record: {
        // monitor global record update
        // (e.g. login changes after block is mounted)
        immediate: true,
        handler() {
            console.log('BB-question: record changed')
            if (this.record) this.setLocalRecord()
        }
    }
 }
The handling of active user and other state management is all done within the over-arching Vuex state management and as long as these mutations are used the storage of data should be transparent to the block.
Please note that EVERY block has its own instance, so multiple blocks of the same type all will have their own local data. No data should be stored outside the block instance as otherwise your block cannot exist more than once in any eActivity.
Tracking Development
When developing a new block as a third party a dedicated branch will be set up for your development purposes. It is your responsibility to set it up to track the main develop branch.
How this is done differs per Git tools used. Below is a screenshot of the well-known Tower app which facilitates this via their easy-to-use interface:
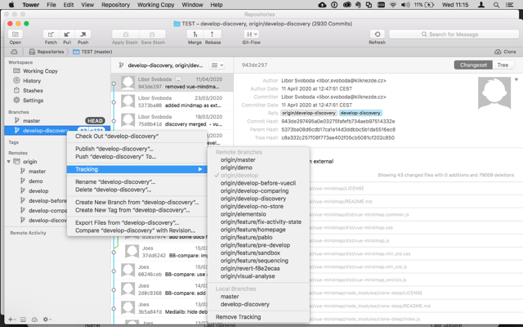
The develop-discovery branch is selected and via Tracking it is connected to origin/develop, the main development branch of the repository. This way changes from the branch develop can be pulled into the local branch.

Shown here is that 131 changes can be pulled in from the develop branch and there are 3 outstanding changes to be pushed into develop-discovery.
This way you can ensure your local development works with the current version of the main branch which avoids integration problems later in the project.